
Peter Pretorius Morgan Plus 8

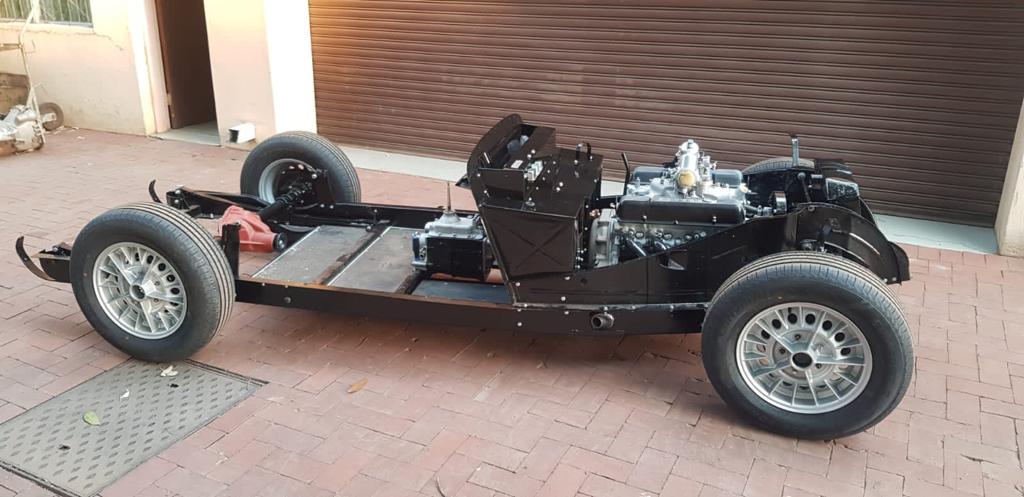
My Morgan Plus 8 (Rover V 8 – 3.5L) is a 1971 model ( Serial no R7400) with 3.5 l Rover V 8 motor and Moss gearbox, which I purchased in 2012 , being the 4th owner, and has now completed 98,000km. The car had a nut and bolt restoration in conjunction with close friend Kobus van Wyk in 2013. Since the restoration, I have completed 31,000km of trouble free driving, having covered several trips to the Western and Eastern Cape areas and having joined in a number of CapeMog tours.
Following the restoration of the Morgan Plus 8 in 2013 the following upgrades have been done through to 2021
Aluminium radiator fitted with high output thermatic 14 inch fan
After the rebuild of the Morgan, engine overheating continued to be a problem. In talking to the previous owners it was apparent that this problem goes back for many years. The search then began to find someone outside of SA who had experience with overheating on Plus 8’s and had solved the problem. Contact was made with a guy in Australia who races a Plus 8 and achieved good results. He shared all the details with me. I had to find someone in SA to manufacture an 81mm Aluminium core radiator to the design I received. As I could not find any one I decided to import the radiator from PWR Performance Products in Australia (They had the design of the specific Radiator required). The 14 inch high output fan as well as a thermal switch was also ordered from Davies Craig in Australia. . The radiator was manufactured to allow for the mounting points of the specific fan. The installation was simple and has greatly improved the overheating problem. (I have shared the design and the radiator can now be manufactured in SA)

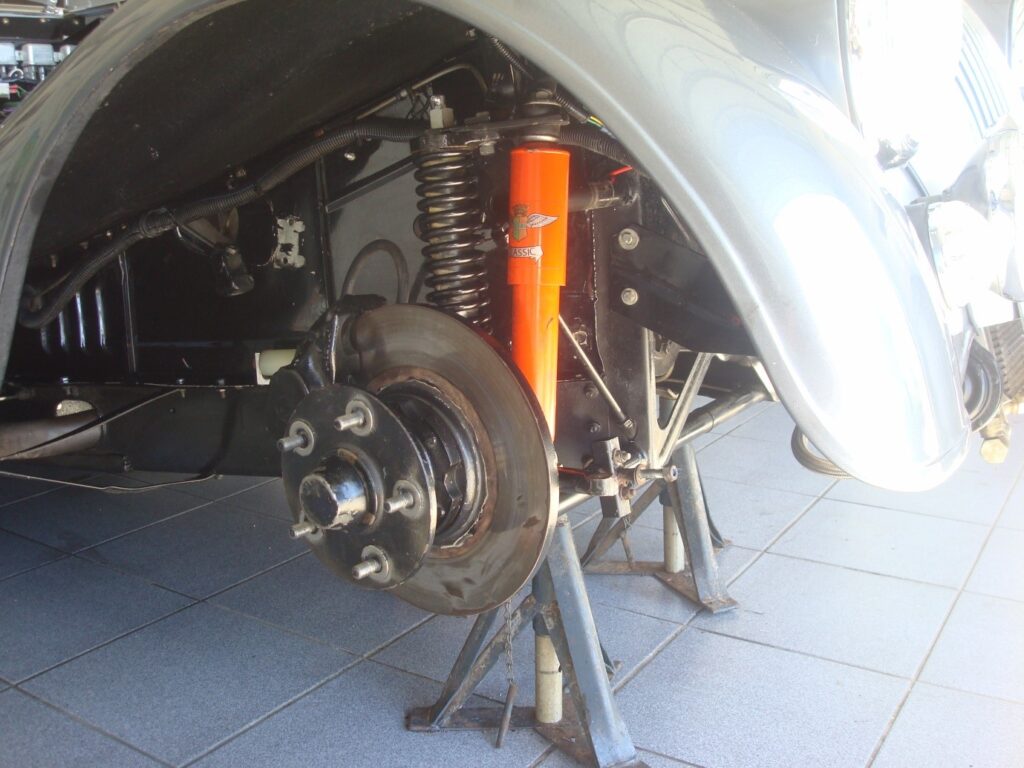
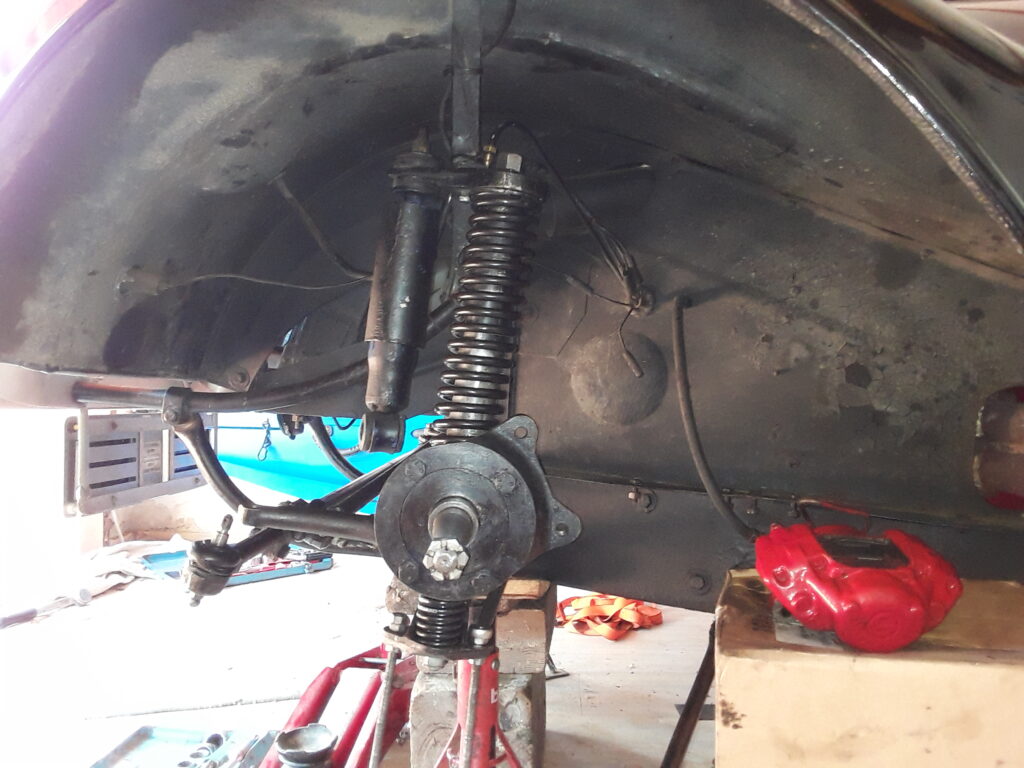
Steering & Front Suspension upgrade
Excessive play in the Cam and Peg steering box could not be resolved as the box or parts were no longer available and could also not satisfactorily be adjusted. In addition the steering was very heavy to turn!! This forced me into another search outside of South Africa. The first break through was finding a roller bearing kit which replaced the damper blades (Springs 2 inch shorter were also fitted.) The advantage was a lighter steering and with the bearings fitted, the messy lubrication system was no longer required. The search continued and I managed to locate a second hand Morgan rack and pinion steering which meant that I could discard the worn-out steering box. While going to work on the front suspension it was decided to also replace the kingpins with new hard chrome kingpins and bronze bushes .All the parts and fitting instructions were obtained from MULFAB, a company located in the UK. The owner Peter Mulburry was most helpful throughout the whole process of installing the parts.

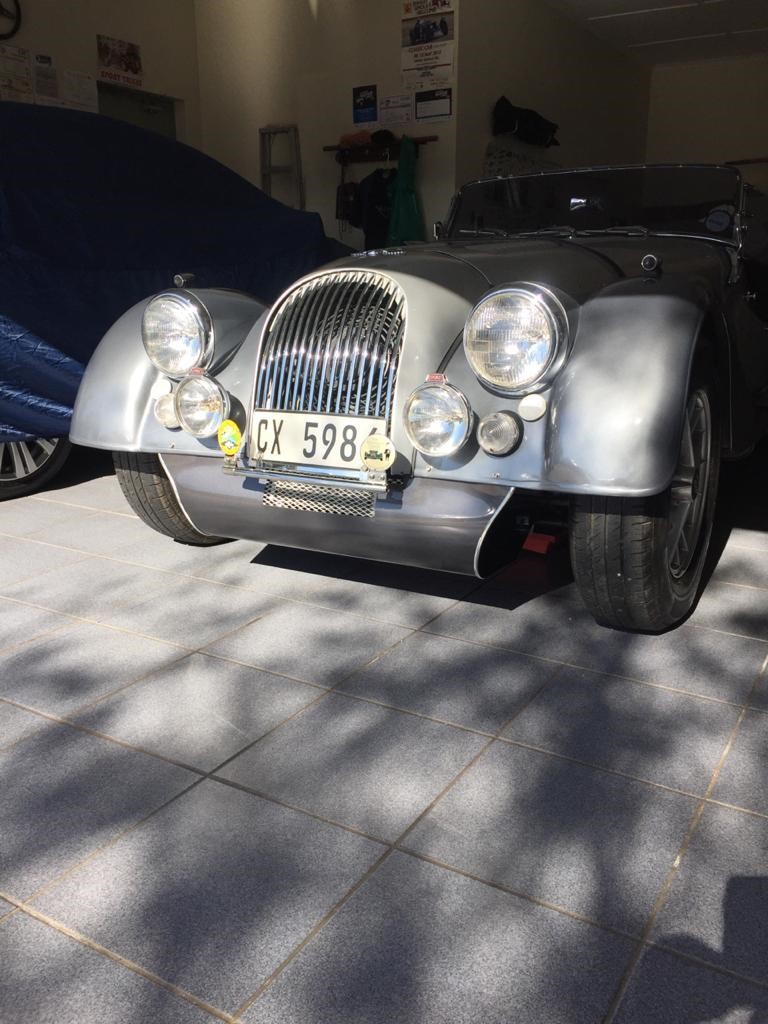
Engine Under Cover Air dam
To further improve the cooling of the engine more research was done , which resulted in the addition of an under engine dam cover. The concept of the the under engine air dam, is that it will reduce the airflow coming from under the car and create a high pressure area around the engine . The high pressure area, in the engine compartment, behind the radiator, inhibits cooling air from flowing through the radiator and cooling the engine. The template was manufactured from cardboard and the final product was laser cut from a 1.5mm thick aluminum sheet. Positive results have been achieved and it also improves the front-end look of the car.

Branch manifold for the Plus 8

The two cast iron exhaust manifolds on either side of the engine developed cracks and it was decided to have branch manifolds manufactured . Because of the limited space in the engine compartment it became a difficult task but was satisfactorily manufactured by a local Knysna company – Auto Boss. The exhaust flanges were laser cut from steel and the branch sections were manufactured from 40mm stainless steel piping . In addition flexible joints were included on both sides . The branch manifolds also have two benefits – more performance from the engine and less heat is trapped in the engine compartment .
**************************************************************************************************************
Morgan Plus 8 1979 : Dennis Cook
I bought this aluminium bodied car in early 2019 from well-known Morganeer, Terry Allan, who had raced it successfully for many years. I flew up to Johannesburg to view the car, but it boiled after driving once around the block and the brakes did not work. It had obviously been neglected and abused so why did I buy it? Firstly, there were not many choices available then; I wanted a wide body Plus 8 with the Rover 5 speed box and Terry’s car had many extras, including 4 barrel Holley, Offenhauser inlet manifold and adjustable telescopic shocks front and rear as well as an electric water pump. Having struck a deal, Terry kindly delivered the car to my home in Sedgefield along with some spare bits. This car has the 14 inch Millrace rims and was first registered in SA in 1981.
Although the Mog obviously had lots of problems, I envisaged a rolling restoration that would enable us to join the 2020 CapeMog tour. Luckily the Tour was cancelled as it has taken me nearly 2 years to get the car sorted out in what became an almost complete restoration without taking the body off. Although the car had plenty of power, it could not travel more than about 10km without overheating. Not suspecting that there were problems with the motor, which seemed strong and ran smoothly, I flushed the system and had a new aluminium radiator with 3 extra rows built by Knysna Radiators, while I waited for Melvyn Rutter to send me new brake discs and other parts.
Having overhauled the braking system, by early 2020 I was driving the car only for short distances and the overheating problem remained unresolved. I tried various electric cooling fans, sometimes fitted in front of the radiator and sometimes behind, and wired the electric water pump to run constantly. After reading on one of the forums that the answer to heat build-up in the plus 8 was to have the headers ceramic coated both inside and out, I thought that I had found the answer. By now we were into the first lockdown. Luckily I found a company in Cape Town that had an essential services permit and sent the headers to be coated. Each time I was getting only a small improvement in the cooling and having purchased a digital engine thermometer, sent the temperature gauge to be rebuilt (along with the speedometer that did not work). Now I knew accurately how hot the engine was getting!
Finally the motor had to come out and the engineering company in George condemned it as having been machined to the utmost tolerances and it had problems with the cooling jackets. How to find another motor? My car was at Landyworld who have lots of experience with the Rover V8 motor. Craig, the owner, is a real petrolhead, having both supercars and bikes. He offered me a 4.6 l Discovery engine that had come out of a destroyed competition Landrover. Months went by while the motor was rebuilt, missing bits found, and the cooling system sorted out. Surprisingly, we found that the thermostatic cooling fan fitted to the front of the radiator delivered the best results. We are also running Redline Water wetter in the cooling system.
I drove the car for a while, attending a Classic car show in early 2021 in Calitzdorp with Ronnie and fellow Mog owners , but felt that the car was unsafe with that much power but too much play in the steering.

I had the steering shaft and steering box rebuilt, in Cape Town, fitted new tie rod ends and had stainless steel kingpins fitted with new bushes. The handling and steering is much improved.
The car has been resprayed in a metallic blue, much like it was when owned by Terry. I guess that the next step will be to attend to the trim and the awful PVC weather equipment.
Helpful and recommended Service providers were :
Ferrobrake George/Epping
Sun Instrumentation in Benoni.
Powerkote Ceramic coating in CT
Landyworld, George who solved so many challenges with the Rover V8 motor.
Sedgefield Panelbeaters- true perfectionists

Plus 8 1979 in Sedgefield
**************************************************************************************************************
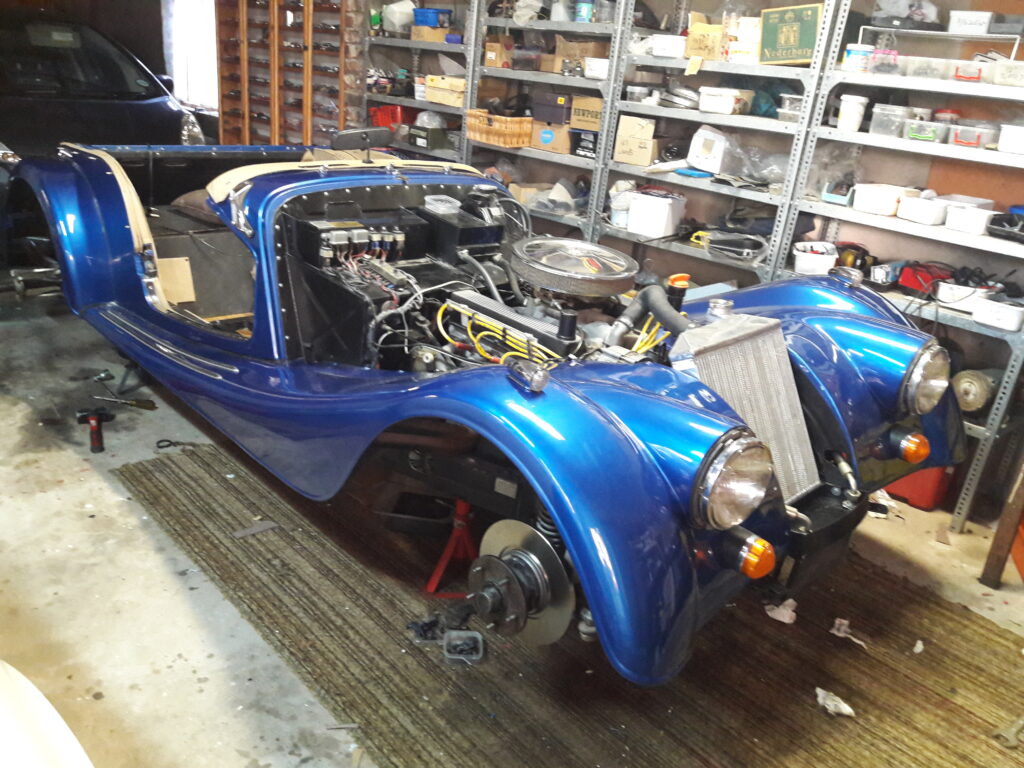
Conrad van Wyk
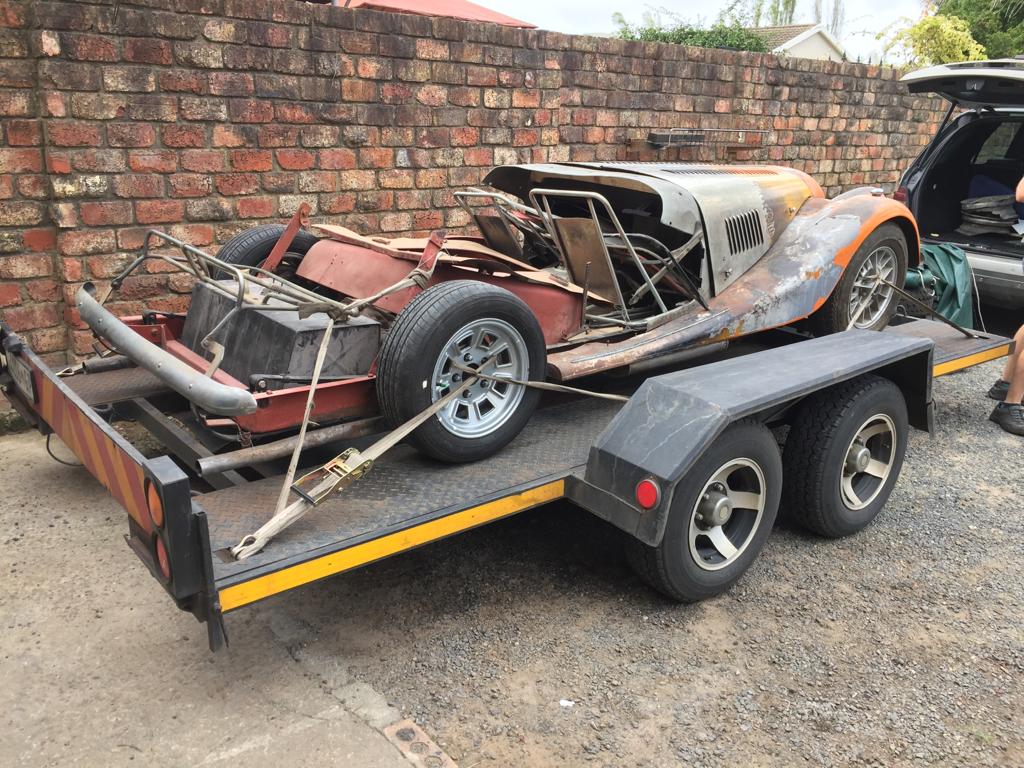
Conrad, whose father is well known Kobus van Wyk purchased a Plus 8 that had been badly burnt out in Knysna- sadly the owner lost not only this car but also an MG TF. He is undertaking a complete restoration and here are some pictures showing the progress of what will , undoubtedly, be a beautiful Morgan.


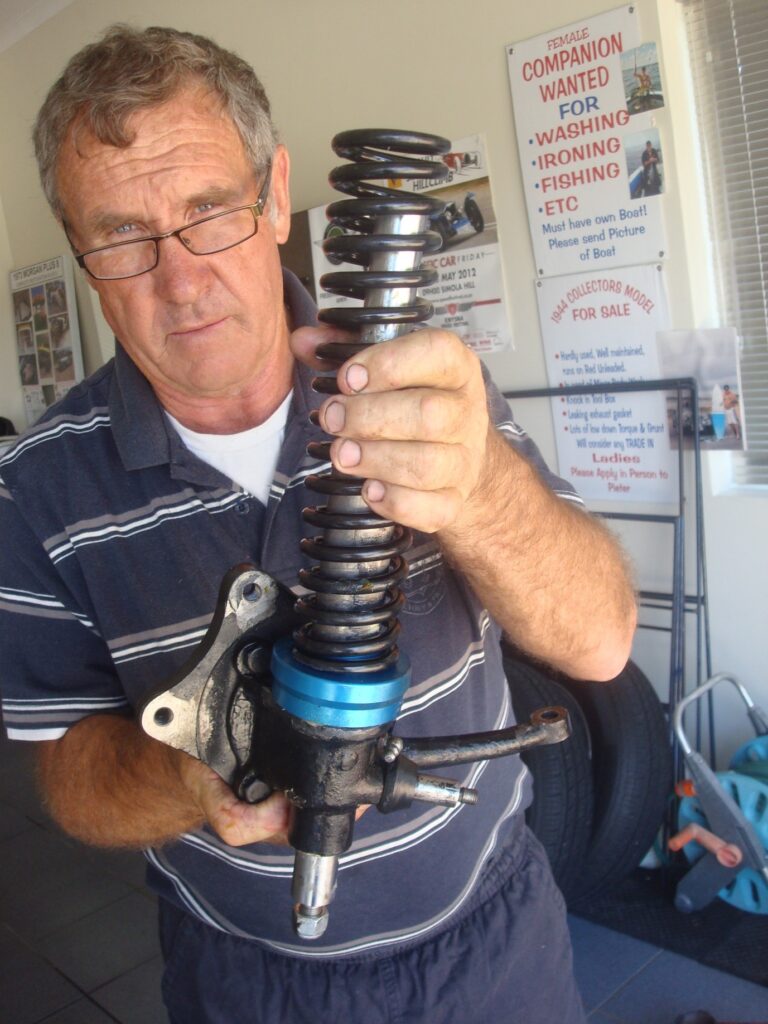
FITTING NEW MAIN AND REBOUND SPRINGS TO A MORGAN 4/4 by Derek Law
This is a brief description of a replacement which I recently undertook and which seems to be successful thus far. I was asked to submit this although I suspect I may be teaching quite a few grandmothers to suck eggs.
After buying the car I soon experienced the infamous Morgan Shimmy. I consulted Dennis Cook and learnt of the usual cure which is to remove any fore and aft movement of the damper blades. This did not work and I mailed the webmaster of https://www.gomog.com. Lorne Goldman is friendly and very generous with his knowledge and experience. He gave me excellent advice and encouragement. He informed me, without seeing the car, that I would find excessive play in the lower kingpin bushes. This proved to be correct. Both the bushes and the kingpins were worn. I then removed both stub axles and kingpins following the GoMog procedure to the letter. When releasing the pressure of the main spring I used normal 8mm threadbar from Mica. However when it came to removing the mainsprings they almost fell out instead of having to heaved out with the required padding to protect the mudguard. Lorne told me that if that was the case the mainsprings need replacing.

I researched the spring specs and found that the existing springs were non standard. Made of 9mm steel and only 300mm long. The proper springs are 360mm long with 8mm steel and an ID 42mm and OD 58mm. I decided to have them made at Saayman Springs in Bellville. (Here we need the photo of the old and new springs) Meanwhile the old kingpins were at Eagle Hard Chrome in Paarden Eiland where the diameter was reduced and then hard chromed back to 1 inch. They also put in new phosphor bronze bushes and line-reamed them.
The new springs arrived from Saaymans but by then I had contacted a friend in New York who was returning to SA in October and was happy to bring parts over in his luggage. I ordered new main and rebound springs and damper blades and shims from Morgan Motors of New England. They are much cheaper than UK. All these items cost $179. Much less than UK prices.
I replaced the springs following the GoMog procedure but discovered some modifications which worked very well and allowed me to install everything almost singlehandedly. I will pass these modifications on. Firstly, I made a plate with runners to guide the springs into place. (see picture of the plate)
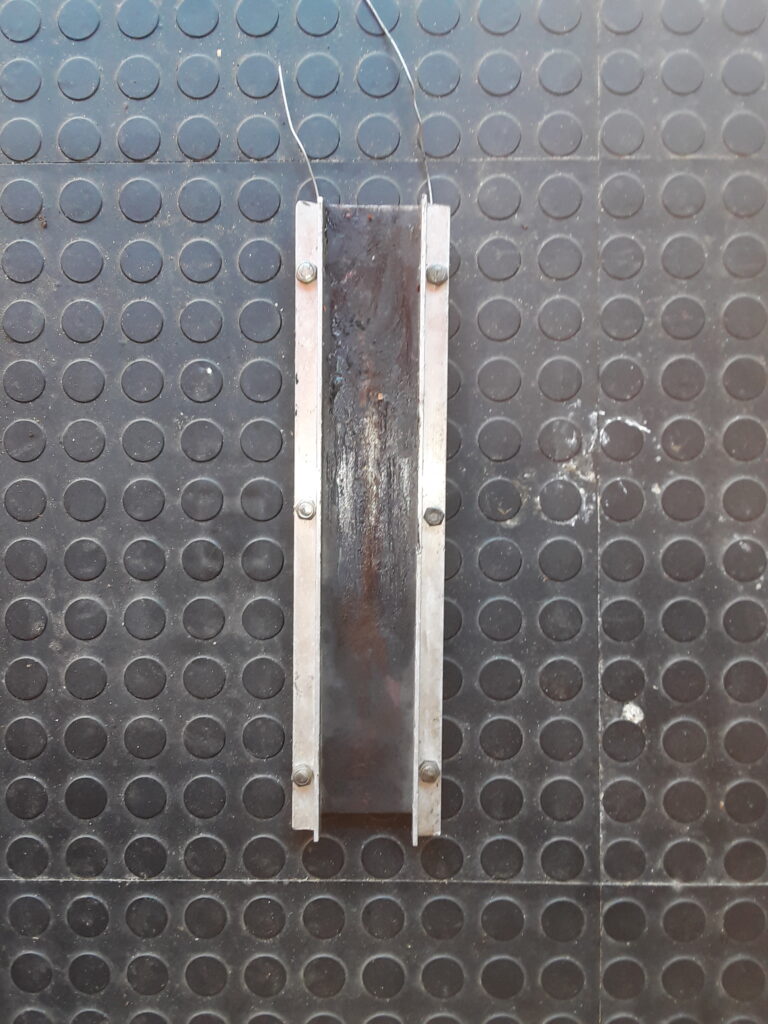
This needs to be greased and a wire bridle attached to go around the mudguard bracket to keep the inboard end of the plate in place. Once the spring is in place you can cut the wire to remove the plate.
The next modification is a line around the base of the kingpin to keep it fully up while the spring is pulled in. Having the kingpin fully up prevents the spring buckling and removes the need to have a jack under the tip of the stub axle during the operation. (see a photo showing an orange nylon line around the base of the king pin)
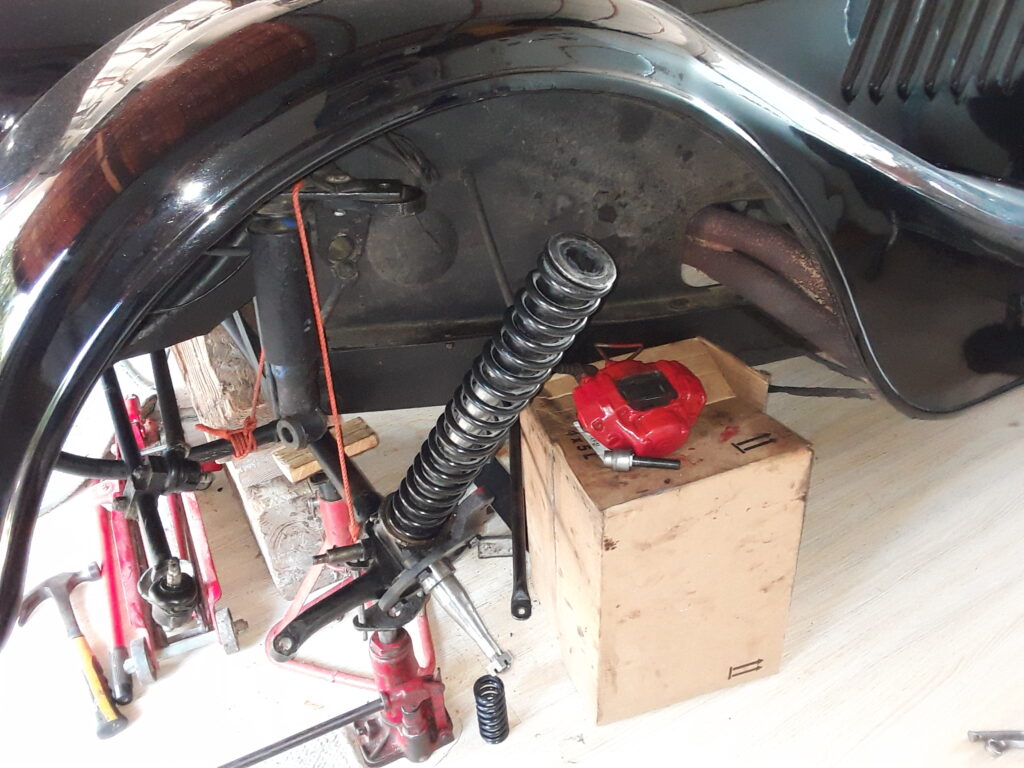
Then I discovered (the hard way) that it is essential to have the car supported under the front chassis but also to have axle stands under each outer end of the lower bar of the crosshead. Both sides must be supported on these axles stands although the weight of the car stays on the chassis blocks. If these stands are not there the lower bar of the crosshead will bend down with the force of the compressed spring and the top kingpin bolt (with the oil feed) will not reach the thread on the kingpin. If this happens you need to start over.
Lastly, I bought a simple ratchet cargo strap from Midas. It is small, with only a 600kg pull and not expensive. (photo).

The fixed end of the whip is attached to the top of the mainspring on the side you are not working on. Push the strap through the top bar of the crosshead (it is a hollow tube with 1 inch ID). It goes around the top of the spring to be pulled and then back to the other side passing just under, and behind the fan. This can be ratcheted up and then, with an enthusiastic wife to hold the plate perpendicular to the car and leaning down on it, you can easily heave the spring into place and then continue as directed in the GoMog.
These additions to the GoMog procedure did away with the need for hammering the spring into place and made the job very easy.
Derek reports that he has done a few longish trips in preparation for the upcoming 2021 CapeMog tour and that his Mog now has a much more comfortable ride.